When a UI test fails, the first reaction on most teams is, “UI changed again?” In many cases, the real culprit isn’t the change itself, but how we wired our tests to the UI. That wiring happens through locators and test hooks. Get them right, and your regression suite feels rock-solid. Get them wrong, and you’ll spend half your week fixing “random” failures.
In this blog, let’s simplify what locators and test hooks are, why they matter, and how to design them so your tests survive real-world UI changes.
What are locators, really?
A locator is simply the way your test automation script finds an element on the page: a login button, a search field, a menu item, a toast message, and so on.
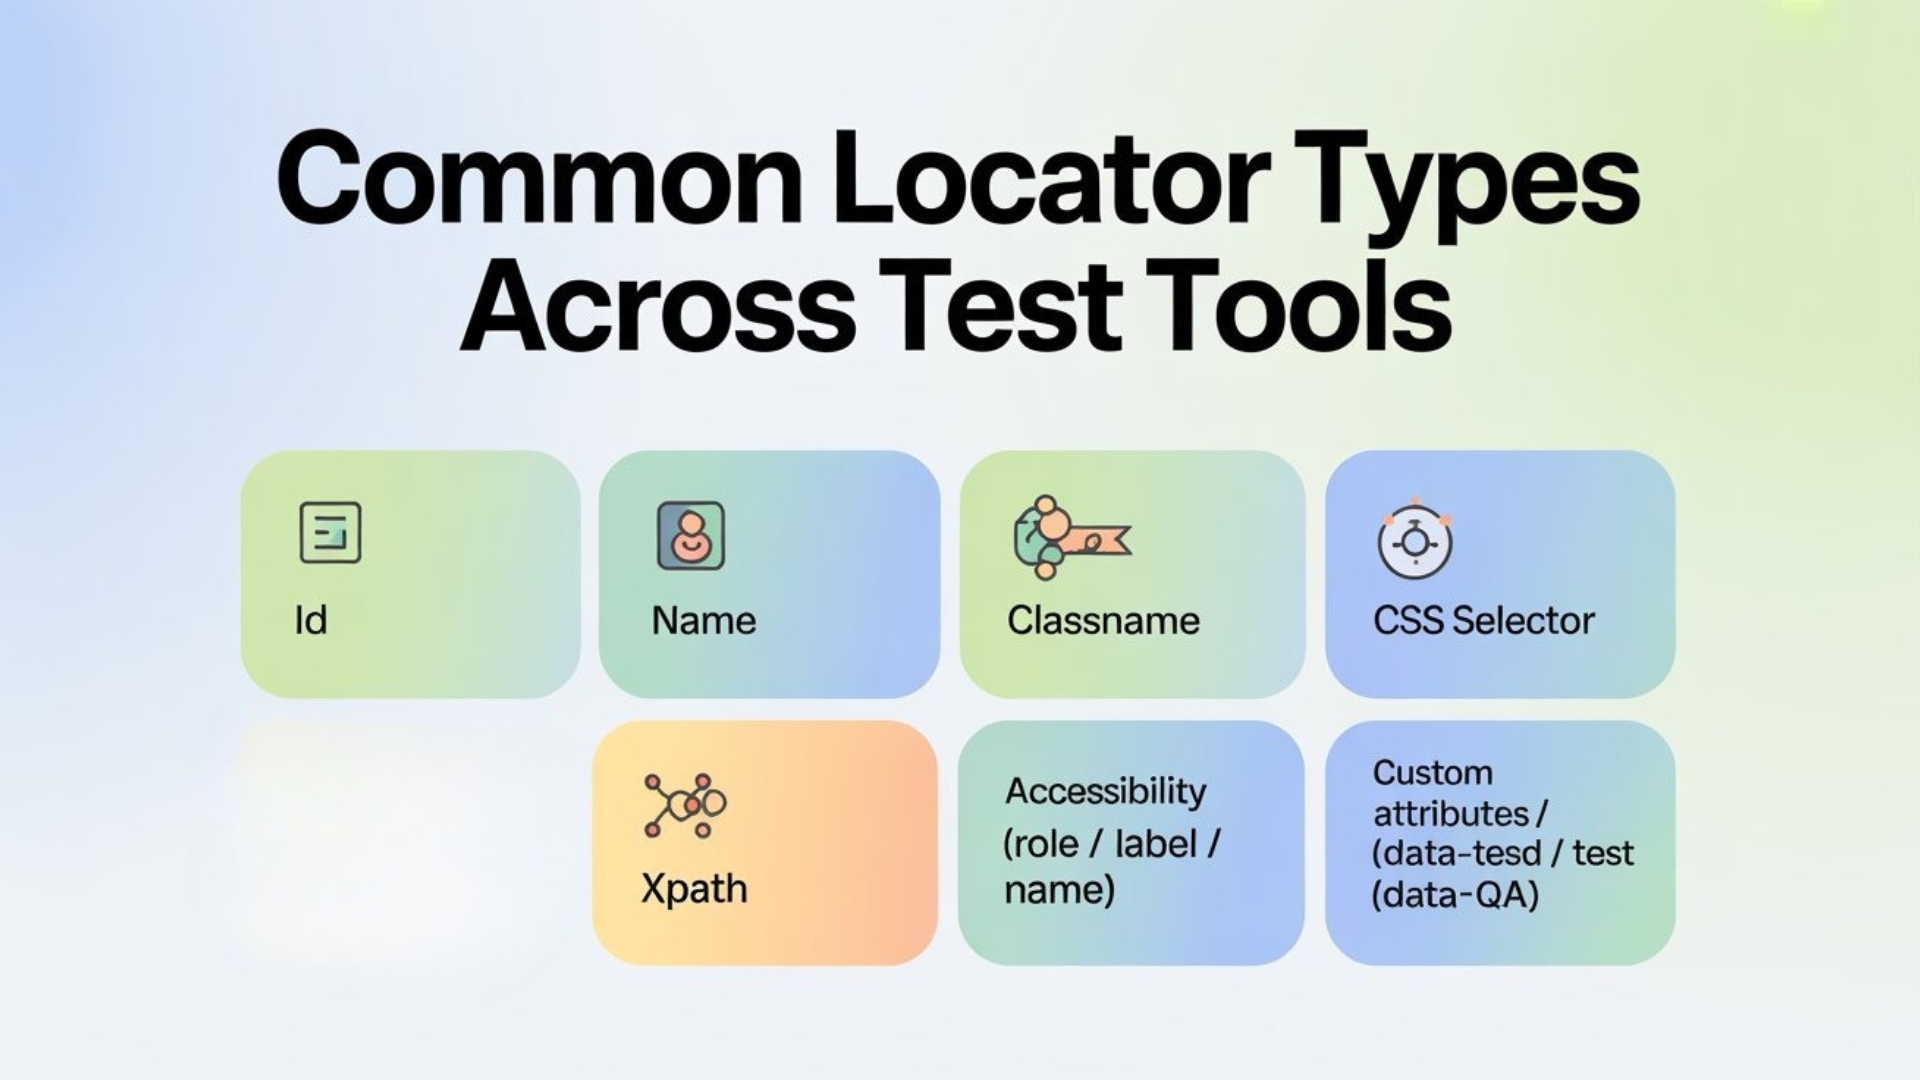
Common locator types across tools:
- id
- name
- className
- css selector
- xpath
- Accessibility properties like role, label, name
- Custom attributes like data-testid, data-test, data-qa

On paper, all of them “work”. In practice, some are stable and intention-revealing, while others are fragile and tie your tests to the visual structure of the UI.
What are test hooks?
Test hooks are special attributes or identifiers added to the UI only to help automation and debugging, not to affect actual business logic or styling.
Examples:
- data-testid=”login-submit-button”
- data-test=”cart-count”
- data-qa=”profile-menu-link”
These attributes act like handles given by developers to QA so that tests can find elements reliably, even if:
- The CSS classes change
- The layout is refactored
- The DOM structure is reorganized
Instead of chasing DOM structure and CSS names, your tests can say: “Find the login-submit-button hook. I don’t care where you place it in the layout.”


Why flakiness often starts with locators
Most flaky UI tests are born from:
- XPaths like //div[3]/div[2]/button[1]
- CSS selectors like .btn.btn-primary:nth-child(4)
- Locators based on text that frequently changes (marketing copy, content A/B tests)
These are brittle because they depend on how the UI looks and not what the element represents. As soon as the DOM is rearranged, your “position-based” locator breaks.
Test hooks shift the focus from structure to intent:
“This is the primary login button.”
Not: “This is the third button inside the second div of that flex container.”
Designing a locator strategy as a team
A stable automation suite starts with a shared locator strategy between Dev + QA:
- Decide your primary locator type
- For most modern teams: data-testid (or similar) becomes the default.
- Define naming conventions
- Use meaningful names: login-email-input, login-submit-button, cart-icon, search-results-list
- Avoid random IDs or auto-generated values.
- Restrict usage of brittle XPaths
- Only allow XPaths for tricky cases where nothing else works.
- Encourage accessibility-friendly locators
- Use roles, labels, and names that help both accessibility tools and automation.


Document this in a simple “Locator & Test Hooks Playbook” and share it with both developers and testers.
Where test hooks belong in the dev workflow
To make test hooks effective, they should be:
- Added during component development, not as a last-minute fix
- Reviewed in code reviews (e.g., “Have you given automation-friendly hooks for important elements?”)
- Included in UI component libraries so that hooks are part of reusable building blocks
Over time, you’ll find that developing with test hooks in mind makes your UI more testable, more accessible, and easier to debug.
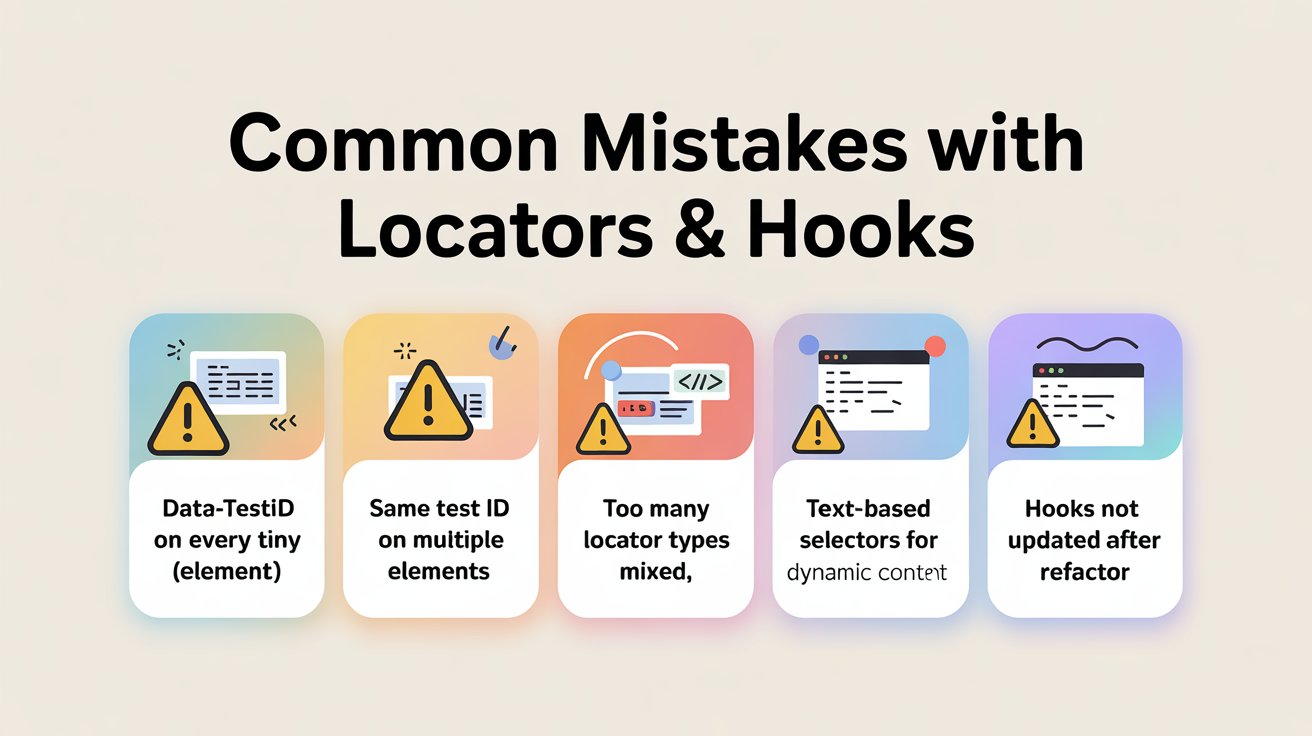
Common mistakes with locators & hooks
Avoid these traps:
- Using data-testid on every tiny element – this creates noise.
- Reusing the same test id for multiple elements.
- Mixing too many locator types randomly.
- Depending on text-based selectors for elements with dynamic content.
- Not updating hooks when refactoring components.
Keep hooks focused on business-critical interactions and validations: primary CTAs, form inputs, error messages, navigation items, key widgets.
The payoff: Stable tests and faster feedback
When locators and test hooks are well designed:
- Test scripts become easier to read: “click login-submit-button” vs “//button[normalize-space()=’Login’]”
- Refactors hurt less: you can move components around without rewriting tests.
- Flakiness drops dramatically.
- You build confidence that a failing test is a real issue, not just a “UI changed slightly” headache.
Think of locators and test hooks as the API for your frontend. Just like backend APIs, when designed carefully, they allow your tests to scale without falling apart every sprint.
If you want to put this locator strategy into practice, the next step is to get guided, hands-on coaching. Our Selenium training in Chennai is designed for busy testers and developers who want to write stable UI automation, not just copy code. With live projects, interview-focused practice and mentor support, you’ll learn how to design robust locators, build maintainable frameworks and confidently handle real-world automation challenges.
FAQs
Q1. What is a locator in Selenium and why is it important?
A locator is how your Selenium script finds an element on the page—using id, name, CSS selector, XPath, accessibility attributes or custom data-test IDs. Good locators focus on meaning, not page structure, which makes tests more stable when the UI changes.
Q2. What are test hooks and how do they help automation?
Test hooks are special attributes like data-testid, data-test or data-qa added only for testing and debugging. They act as stable “handles” so automation can reliably find key elements even if CSS classes or layout are refactored.
Q3. Why do flaky Selenium tests often start with bad locators?
Flakiness usually comes from brittle XPaths, position-based selectors or text that changes frequently. These tie tests to the exact DOM layout instead of the element’s intent, so even small UI tweaks can cause random failures.
Q4. How can QA and developers design a good locator strategy together?
Teams should agree on a primary locator type (often data-testid), follow clear naming conventions, limit complex XPaths, and review test hooks in code reviews. Document this as a simple “Locator & Test Hooks Playbook” for everyone to follow.
Q5. Where should test hooks be added in the development workflow?
Hooks work best when added during component development, included in reusable UI components and checked during reviews. This makes the frontend “automation-friendly” from day one instead of patching locators after tests start failing.
Q6. What are common mistakes teams make with locators and hooks?
Typical mistakes include adding hooks to every tiny element, reusing the same test ID in multiple places, mixing locator styles randomly and forgetting to update hooks after refactors. Hooks should be reserved for business-critical actions and validations.
Q7. How do good locators and hooks make Selenium tests more stable?
With clear hooks and a consistent locator strategy, UI refactors are less painful, flakiness drops, and a failed test is more likely to indicate a real issue instead of a broken selector—leading to faster feedback and more trust in automation.
We Also Provide Training In:
- Advanced Selenium Training
- Playwright Training
- Gen AI Training
- AWS Training
- REST API Training
- Full Stack Training
- Appium Training
- DevOps Training
- JMeter Performance Training
Author’s Bio:


Content Writer at Testleaf, specializing in SEO-driven content for test automation, software development, and cybersecurity. I turn complex technical topics into clear, engaging stories that educate, inspire, and drive digital transformation.
Ezhirkadhir Raja
Content Writer – Testleaf
![]()