An EC2 instance is a web server or a virtual machine in the AWS infrastructure. It stands for Elastic Compute Cloud. It is the most popular service in AWS.
To launch an Amazon EC2 instance, choose an AMI and instance type, configure networking and storage, set secure inbound rules in a security group, and create a key pair for login. After launch, connect via SSH (Linux) or RDP (Windows), verify access, and stop/terminate the instance when done to control costs.
Key Takeaways
- Pick the right AMI + instance type for your workload and budget.
- Security groups are the real “make-or-break”: open only needed ports.
- Always connect + verify after launch and stop/terminate to avoid surprise costs.
Pre-requisites to launch an EC2 instance:
- The user launching the EC2 instance should have proper IAM Access policies or should be the root user to launch the instance.
- Check the region of the AWS account as the EC2 instance is region scoped.
EC2 is region-scoped, so choose the region closest to your users (for lower latency) and match your CI/cloud runner region when testing. Teams serving India + global traffic often validate in at least one nearby region and one “global” region to avoid environment surprises.
Steps to launch an EC2 instance:
- Select EC2 from the compute category of the AWS services.
- Select the Launch Instance option from the EC2 dashboard.
- Choose the Amazon Machine Image (AMI).
- Choose the instance type.
- Configure instance details.
- Add Storage.
- Add tags.
- Configure security groups.
- Review and launch the instance.
- Create/choose a key pair.
1.Select EC2 from the compute category of the AWS services
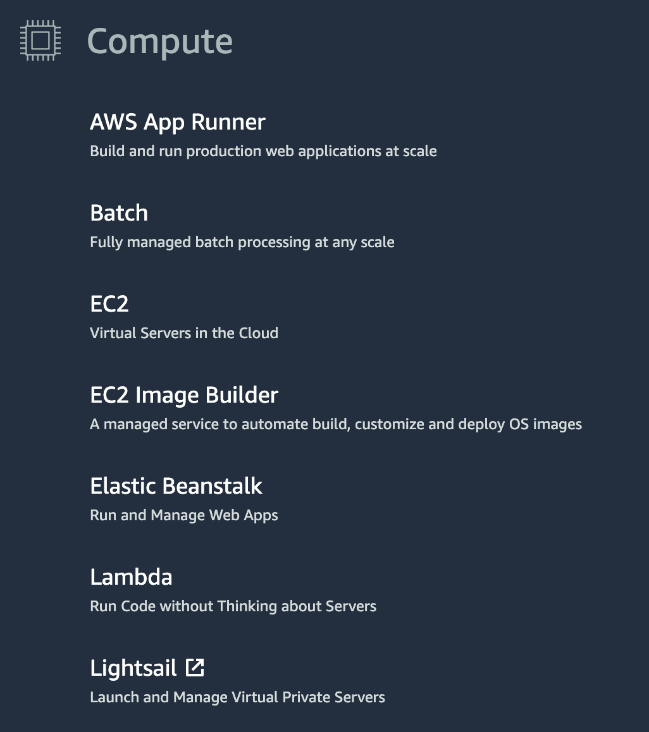
AWS has around 250 services; all these services are categorized based on their usage. Since EC2 is a web server or virtual machine, we can find it under the compute category.
2.Select the launch instance option from the EC2 dashboard
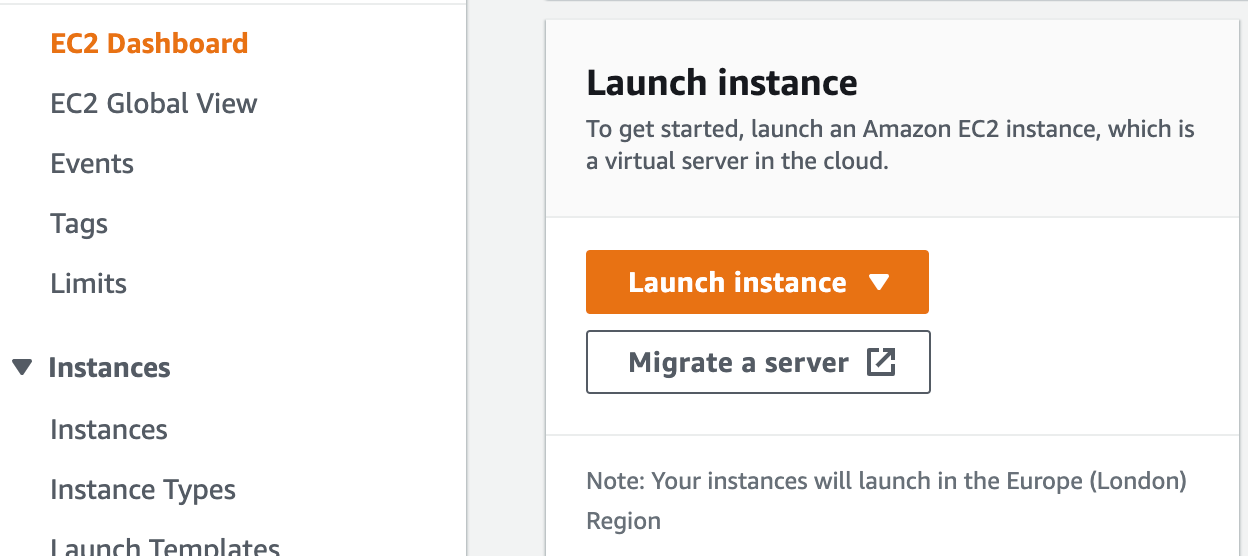
Once in the EC2 dashboard, we need to click on the launch instance option to create a new instance.
3.Choose the Amazon Machine Image (AMI)
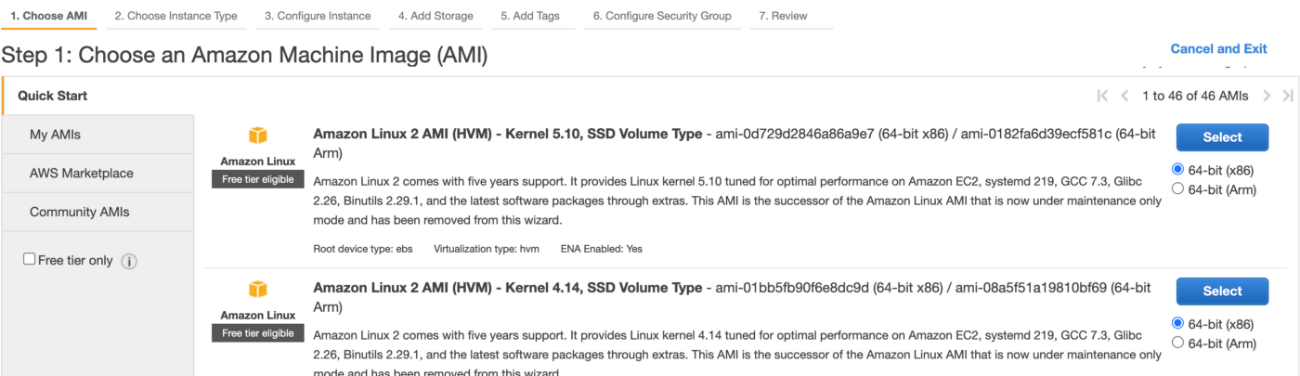
AWS has many Amazon machine images; AMI is nothing but the operating system such as Ubuntu, Linux, Windows, Mac OS, etc. So we can select any AMI we desire to use for our EC2 instance.
4.Choose the instance type
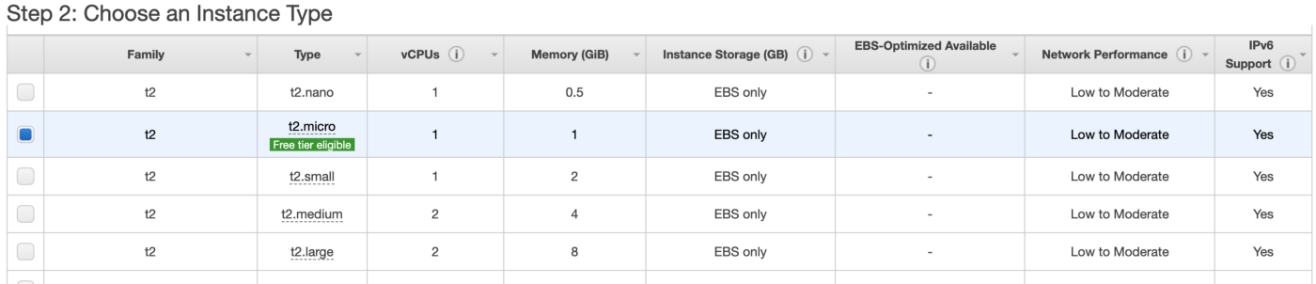
After selecting the AMI, we need to choose an instance type; there are around 750 instance types in AWS, and each instance has its configuration and is different from the other instances. It has attributes such as Type, vCPU, Memory, Instance Storage, Network Performance etc. We can decide the type of instance based on our application requirement. AWS also provides some instances for the free tier.
5.Configure instance details
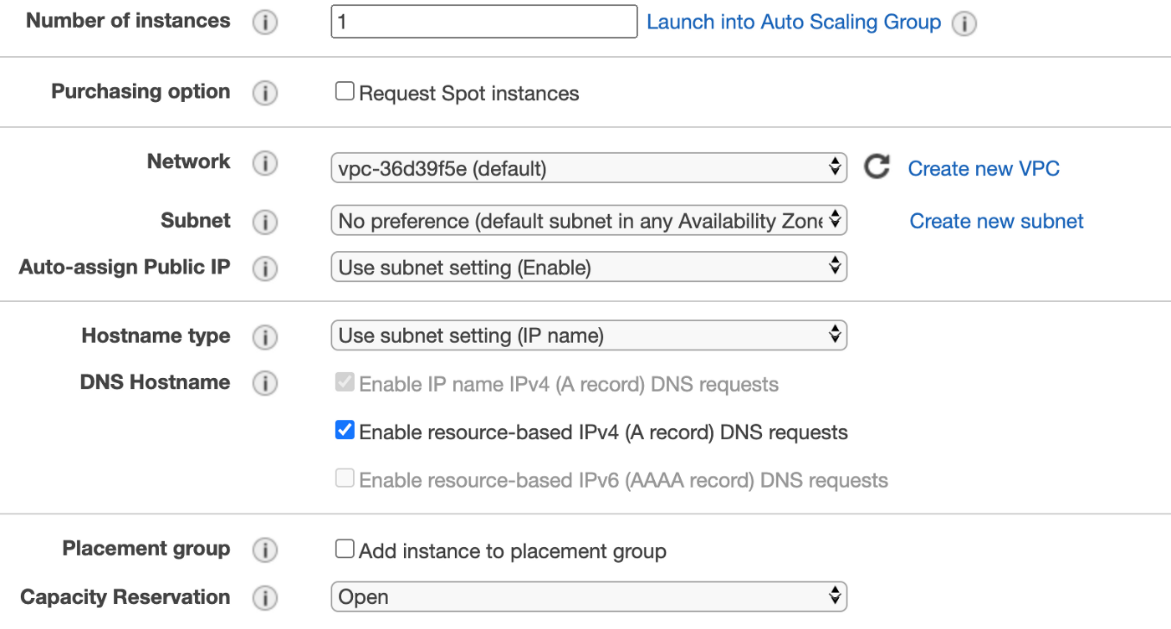
Here, we can configure our instance details such as the number of instances to be created, purchasing options, placement group, and other network settings. We can also install the software we require our EC2 instance to have; this can be done by specifying the user data. The user data will run only once, i.e., at the first booting of the instance, where it performs all the operations specified in the user data.
6.Add Storage
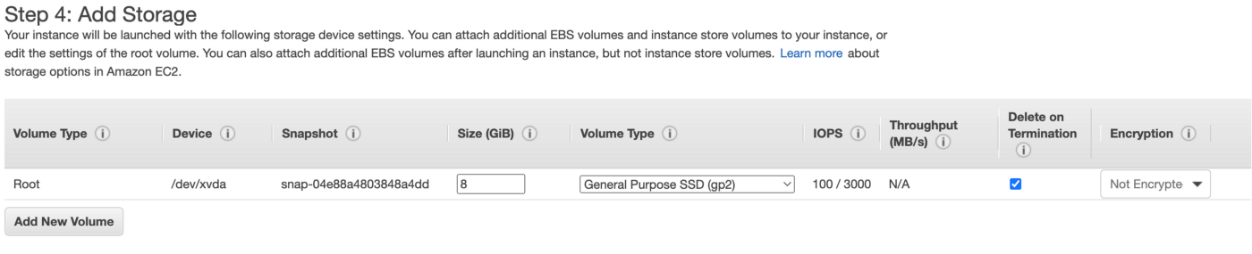
The next step is to add additional storage to our instance; our instance comes with a default root EBS volume. If the user wants more storage, they can create a new EBS volume of any type by clicking on add storage.
7.Add tags
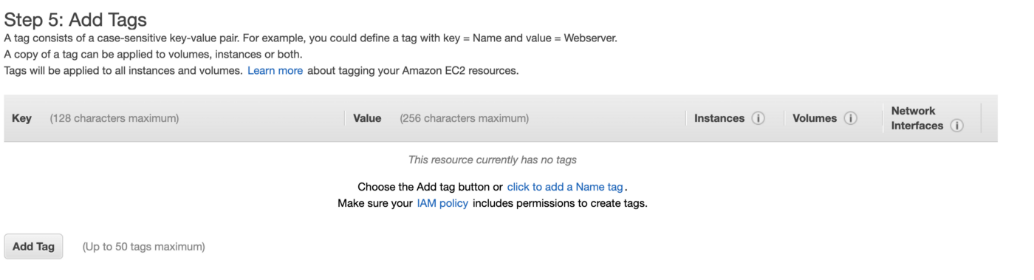 The next step is to add tags, and this is optional. AWS allows us to add up to 50 tags. Each tag represents a case-sensitive key-value pair.
8.Configure security groups
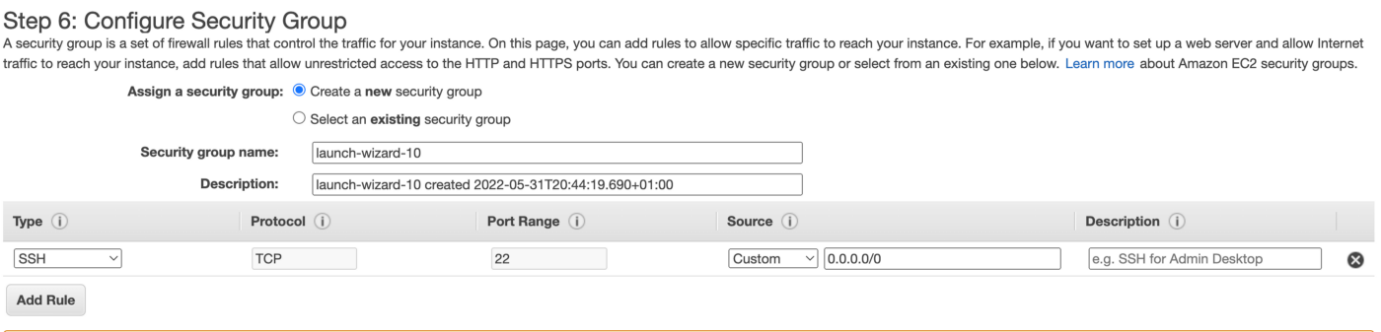
Security groups are the networking fundamentals in AWS. It is the firewall between the EC2 and the internet. We can create and assign a new security group to the EC2 instance or attach an existing security group. This is used to specify who will have access to our EC2 instance. A default SSH rule will be specified while creating it; we can add additional rules such as HTTP or HTTPS and set the source IP address to allow access. (we can also attach an existing security group instead of the IP addresses).
9.Review and launch instance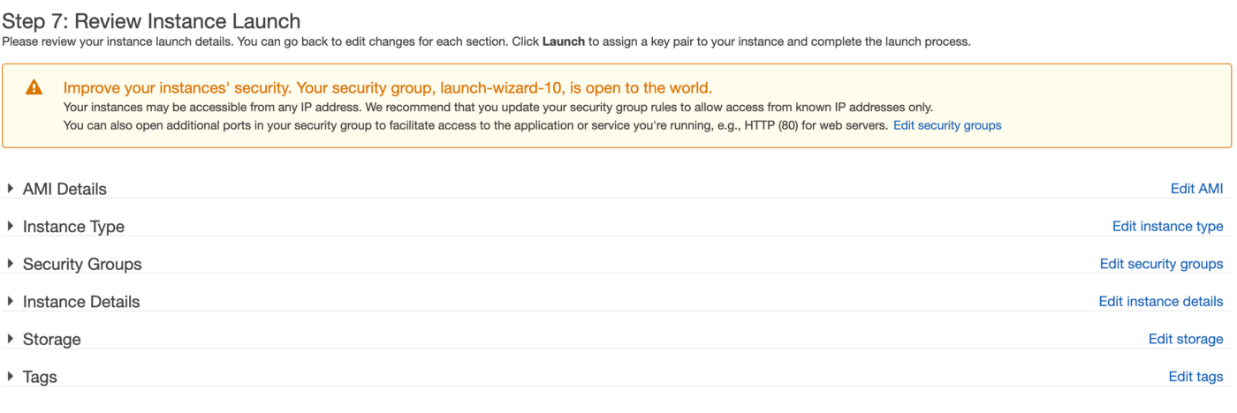 All the details entered in the previous steps will be displayed here; you can review and make any changes before you launch your instance.
10.Create/choose a key pair
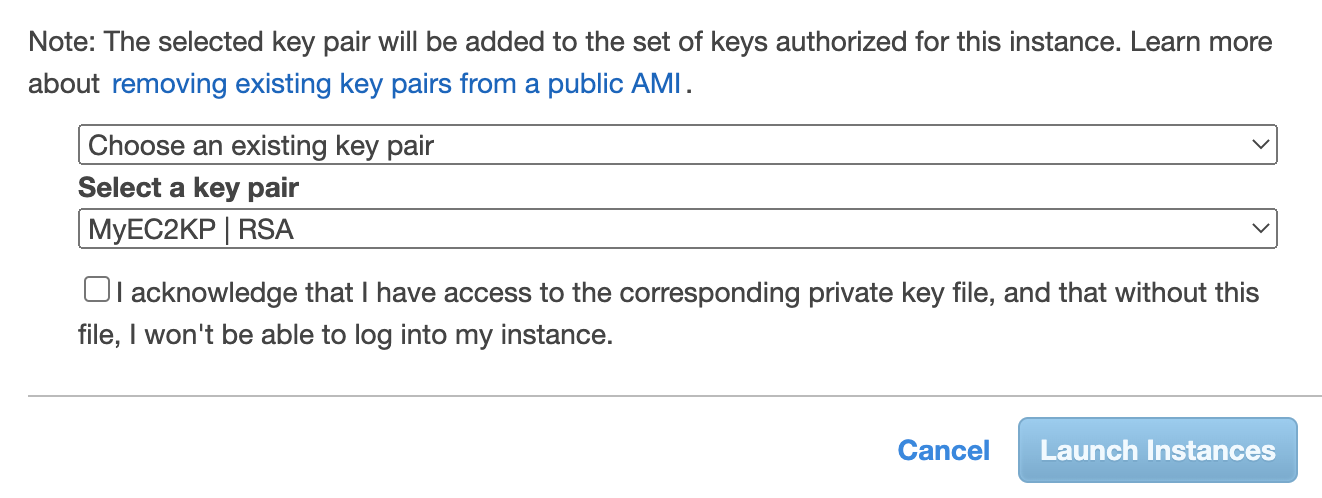
The last step is to create or choose an existing key pair; the key pair combines a public key and a private key file. The AWS stores the public key, and the user will store the private key file; the private key file will have the extension “.pem.” For Windows AMIs, this file is required to obtain the password used to log on to the EC2 instance. For Linux AMIs, this file is required to securely SSH into the EC2 instance.
On clicking the launch instance, our instance will be created.
Connect to your EC2 instance (SSH/RDP)
This is the biggest missing intent gap. AWS’ own tutorial explicitly covers launching + connecting + cost control.
Include:
-
Linux: key pair
.pem, port 22,ssh -i key.pem user@public-ip -
Windows: decrypt password with key pair, port 3389
Cost & safety checklist (must-have)
-
Stop vs terminate
-
Restrict SSH to your IP (never 0.0.0.0/0 for SSH in real projects)
-
Tagging for cost tracking (you already mention tags; add “Owner/Project/Env”).
Common mistakes (quick fixes)
-
Can’t connect: wrong inbound rule / wrong username / wrong key pair
-
Instance running but “unreachable”: no public IP / subnet route / NACL
-
Security group too open
Final Thoughts
There’s a lot that goes into launching a new EC2 instance, but following these steps will help you get started on the right foot. Be sure to read through the Amazon EC2 documentation to get a more complete understanding of all the options and settings available to you. A lot of people have had great success with Testleaf’s AWS certification training online in Chennai. The success rate has been really high, which is great news for anyone looking to get into this field.
FAQs
1. How do I connect to an EC2 instance after launching it?
Use SSH for Linux and RDP for Windows. You’ll need the key pair you selected during launch and the correct inbound port rules.
2. What is an AMI in AWS EC2?
An AMI is the base image (OS + configuration) used to create your instance.
3. What is a security group and why is it important?
A security group acts like a firewall controlling inbound/outbound traffic. Open only the ports you truly need.
4. Should I stop or terminate an EC2 instance?
Stop when you plan to reuse it; terminate when you’re done to avoid unnecessary charges.
5. Why can’t I SSH into my EC2 instance?
Common reasons: port 22 blocked, wrong username, wrong key pair, or no public IP / routing issue.
6. Which region should I choose for EC2?
Choose the region closest to your users and the same region as your CI runners for consistent testing.
We Also Provide Training In:
- Advanced Selenium Training
- Playwright Training
- Gen AI Training
- AWS Training
- REST API Training
- Full Stack Training
- Appium Training
- DevOps Training
- JMeter Performance Training

As CEO of TestLeaf, I’m dedicated to transforming software testing by empowering individuals with real-world skills and advanced technology. With 24+ years in software engineering, I lead our mission to shape local talent into global software professionals. Join us in redefining the future of test engineering and making a lasting impact in the tech world.
Babu Manickam
CEO – Testleaf
![]()